How to make earrings from beads. DIY earrings: master class on making models from wire and beads
One day, while flipping through a magazine, I came across a photo of actress Scarlett Johansen wearing homemade earrings in her ears. I wanted to repeat them and present a master class:

Having closely examined the photograph, it became clear that the silver beads were wire twisted into a “ball”.

For these earrings you will need the following tools: Ruler, round nose pliers, side cutters, duckbills, needle files and 2 pliers.

Wire thickness 1.0 cm, 0.8 cm, 0.6 cm.

Not too large chain, four drop-shaped blue glass beads, 4 drop-shaped pendants.

Additional tools of different diameters.

For earrings, cut 2 pieces of 8 cm long from the 1.0 mm wire using side cutters.

Use a file to process the ends so as not to scratch your ears.

Use the round nose pliers to make a loop.

Holding the loop, bend the wire using the “platypus” method.

Make two identical spirals. The tails are 4.5 cm.


And use pliers to bend the ends a little.

We got these bows or earrings.

Cut 15 cm of wire 0.6 cm thick. Wind it onto a stick or toothpick.

Unwind the spiral.

And form a ball from such twisted wire so that it does not fall apart; pass the free end through the future bead several times.

Use pliers to trim so that the bead is round.

If there is no wire, you can use silver beads with a diameter of 0.8 cm.

There are 6 beads wound on, which is exactly how many you will need for the earrings.

Let's make a ring on which the glass bead and pendant will hang. Cut 12 cm of wire 0.8 cm thick. Wrap it around a round object (here a bottle of mascara) with a diameter of more than 1.0 cm. Leave one end longer.

Thread a bead and a pendant into the resulting ring. Hold the long end of the wire with pliers, wrap the short end 2-3 times, cut off the excess.

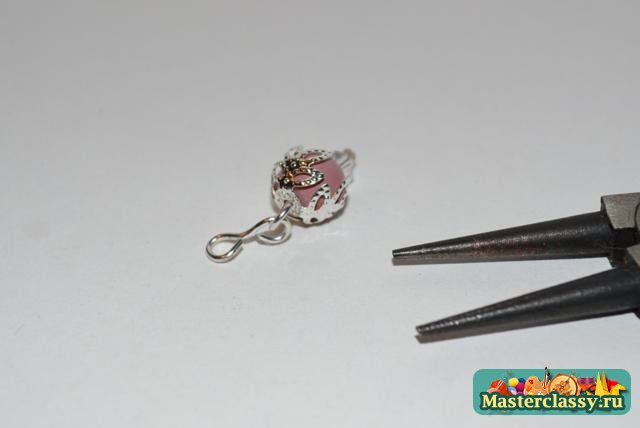
Place a ball of bead on the rod. Using pliers.

This is what should happen. Let's call this a block.

Make 4 of these blocks...


Attach oval rings to the earrings by threading them through the center.

Disconnect 12 links from the chain. Attach the fifth link to the shvenza ring. Attach wire beads to the ends of the chain, loosening the links. Attach another piece of 4 links to the bead on a short chain. And now, by unbending the links, attach a block to the free ends of the chains.

The earrings from the photo are ready, all that remains is to put them on in a worthy manner.

I decided not to stop there and made it with green drops.

This is an option with ready-made beads.

And an evening option.

Rich results from the master class: how to make earrings with your own hands. I called the collection of earrings “Scarlett”.
Creative success, friends!
I would be grateful if, when copying my articles to your website, blog, personal page or diary, you provide a link to the source.Do you like exclusive jewelry? Do you consider yourself a creative person?!
Try to make original earrings with your own hands using various handicraft techniques!
This amazing activity is so captivating that, without having time to rejoice at the new man-made masterpiece,
Another grandiose project is already brewing in my head.
To get you started, we offer you several interesting master classes and video lessons with step by step instructions, with which you can make more than a dozen earrings self made. Our ideas will be useful not only for beginners, but also for experienced craftswomen who have experienced a creative crisis. We hope we can inspire you and direct your thoughts in a creative direction.
You can make these amazing earrings with your own hands literally out of nothing. With minimal costs, the end result will exceed all your expectations! The ganutel technique is an ancient type of Maltese needlework, preserved to this day in the monasteries of the Mediterranean, where nuns use thin spiral wire, silk threads, beads, pearls and beads to create elegant, outlandish flowers of unearthly beauty to decorate the altar.


The term “ganutel” apparently comes from the words “canutillo” (Spanish) and “canutiglia” (Italian), which in medieval Europe referred to a wire made of gold or silver twisted into a spiral. In Russian, this word has apparently turned into “gimp”. The ganutel technique is quite easy to learn. All you need to create your own masterpieces is perseverance and accuracy.
 We will need:
- thick and thin wire
- iris knitting threads or silk threads for embroidery in different colors
- wire cutters
- scissors
- ruler
- ear wires
- wire winder (we'll try to replace it with improvised means)
- beads (optional)
Earrings using the ganutel technique step by step
- Step 1: Making the base springs
Using wire cutters, cut off the required length of thick wire and carefully wind a thin wire onto it in a spiral. To speed up the process and give the product a professional look, you can use a wire winder. If we can’t get one, we’ll make a homemade one from a Kinder Surprise egg and a knitting needle with a curved end. The thickness of the knitting needle should be 2 mm. We pierce the egg right through with a knitting needle.

We take our winder in our left hand and thread the end of the wire into the ring of the knitting needle, as shown in the photo.

We fix the end of the wire on the ring and turn it several times so that the wire holds tightly and does not fly off during winding. The egg will act as a stopper. We wind the wire, pressing it tightly with your hand onto the egg.

We wind the wire, pressing it tightly with your hand onto the egg.

The length of the wrap depends on the size of the earrings. When you are satisfied with the length of the spiral, bite off the wire with wire cutters, leaving a small tip.

- Step 2: Stretch the springs
We remove the resulting spiral from the knitting needle and stretch it a little, like a spring. Ideally, equal spaces should form between the curls, equal to the thickness of the thread.

We will no longer need the ends of the wire, so we can safely bite them off.

- Step 3: Making the Frame
In order for our earrings to keep their shape well and not flatten, it is necessary to insert a frame wire inside the spiral, which should be slightly thicker than the wound wire.

- Step 4: Create a Form
We decide on the shape of our earrings. The first thing that comes to mind is a circle. Why not?! After all, round earrings always look impressive. If desired, the base spring can be given a wide variety of shapes: oval, droplet, petal, heart, diamond, triangle. When you get a little more skilled, be sure to try making earrings using the ganutel technique in the shape of a peacock feather. We create a loop and twist the ends of the wire at the very base.

- Step 4: Wrap thread around the base
Now we proceed to the most interesting stage of the work - winding the frame with threads. The color scheme is selected individually solely according to your taste and color. To create interesting bindings, you can wrap the warp in different directions, alternating threads of different colors. One turn of the wire spiral is one step. The most simple ways winding thread on a wire frame, which is perfect for first experiments:
parallel winding


and winding “from the middle”


In just 5-10 minutes you will see the result of your work. Perhaps it will be something like this:


Finished earrings can be additionally decorated with beads, rhinestones, sparkles, and feathers. And, of course, don’t forget to attach earrings so that all this beauty can be worn.


It is unlikely that you will be able to stop at one model, and soon you will have your own collection of homemade earrings using the ganutel technique. Original handmade earrings are also an excellent gift. In addition to earrings, you can make a cute pendant using the same technique. Happy creativity!


How to make original triangular earrings from paper clips
Such a luxury as ordinary paper clips can probably be found in any home. Sleight of hand and a little imagination will help you turn a couple of banal paper clips into an exclusive decoration. To make original and stylish triangular earrings, we will need threads, scissors, epoxy glue, hot glue or Moment Crystal glue, earrings and actual metal clips. The technology for creating hand-clip jewelry with your own hands is outrageously simple. By varying the color of the thread and the weaving method, you can create an exclusive pair of earrings to match any outfit. This is not sold in stores, so you can rest assured that your creation is unique. And you won’t have to be upset if you lose a paperclip earring, because you can always make a duplicate in a matter of minutes.

We take the most ordinary paper clip and, with the help of a couple of simple manipulations, turn it into a triangle. The illustration shows the disconnect points. In principle, if you wish, you can try to give the paper clip any other shape, for example, a heart, but the easiest and most organic way is to transform the paper clip into a triangle. To ensure that there are no gaps in the base, we fasten the edges of the triangle with epoxy or hot glue.

Using hot glue or Moment Crystal glue, glue the thread to the paper clip. After 10-15 minutes, when the glue has dried, we wrap the thread around the paperclip, and then wrap the triangle in any convenient way, purposefully or randomly forming an earring ornament. We also fix the end of the thread with glue.

We attach the earrings and our masterpiece is ready to be tried on! Horizontal stripes are perfect for a neat, classic look. Fantasy meshes will also look impressive. If you pre-string small beads or beads onto a thread, your collection of handmade jewelry will be replenished with a pair of glamorous pendants. By experimenting with colors and the method of winding threads on a triangle base, you can make original sets of pendants in various styles, ranging from classic and ethno to avant-garde. Triangular earrings made from paper clips are a great accessory for boho clothes!

DIY fantasy spider web earrings
Elegant and sexy, hoop earrings almost never go out of style. And if they leave the fashionable Olympus for some time, it is only in order to return even more spectacularly. Large hoop earrings, called congo, apparently got their name from the country of the same name, whose residents obviously love to decorate themselves with these colorful accessories. And they do it right! Hoop earrings are a universal accessory that will suit any face shape and any hairstyle, be it playful curls, glamorous curls, a strict bun on top or a ponytail. Either way it will be very sexy.


If you approach the matter creatively, ordinary ring-shaped earrings can be decorated in a very unusual way. One of the most beautiful ways is to crochet openwork webs on rings. To make original spider web earrings with your own hands, you don’t have to be an experienced knitter. It is enough to have basic crocheting skills.


To work, we will need a round base for earrings or familiar old ring-shaped earrings that could use a creative upgrade, iris or Maxi threads, and a 0.5-0.75 hook. For glamorous decor, beads and beads can be useful.

We tie the base for the earrings with a single crochet. We knit the second row in the same way with a single crochet. Well, then everything depends solely on your imagination and desire. You can knit a neat openwork mesh (1st/n, 2 in/p), or deliberately rough large-format holes ((1st/n, 5 in/p). Don’t forget to reduce each subsequent row by 1-2 arches. We finish knitting connecting posts. We cut off the end of the thread and hide it in the knitting. In general, get creative! Vary the color of the threads and ornaments, and you will always look original and stylish!
Making a simple earring - It took less than 3 minutes to make one earring. 1. Ear wires - 2 pcs. 2. Pins-studs - 2 pcs. 3 Beads. 4. Round nose pliers and wire cutters.
another simple earrings
Earrings made of wire Wire - http://greenbird.ru/ Wire - Artistic Wire 1.02 mm 2 bases for earrings (earrings)
there are a lot of tutorials on making jewelry - http://www.youtube.com/user/BeadAnimation/videos
Look at this beauty -
DIY earrings: photo ideas

Today we will talk about how to make earrings with your own hands. In fact, this work is not difficult, but it is very painstaking and you should arm yourself with patience before taking on it. Probably every woman loves jewelry, but not everyone can afford to have a lot of it. The solution is to make them yourself. All you need is desire, patience and an idea. And, of course, some consumables, which you can choose from in haberdashery or handicraft stores. However, even at hand - if you look well somewhere in a closet or closet, you can find a lot of interesting things, which is a must suitable for making earrings.
First you need to choose beads that match each other, creating a special mood and emphasizing the style. This is very important, because earrings should be unobtrusive and tastefully made. In addition, it is no less important what outfit the earrings go with, and whether they will harmonize with other accessories, because they should fit into the image, and not stand out from it.
We have prepared several master classes for you, which you will find below, where all the stages of making earrings are described in detail and, armed with the necessary materials and tools, you can make such cute pendant earrings with your own hands at home A.You should not buy a lot of beads and seed beads at once; it is better to choose a few, but carefully. Well-chosen beads can create an amazing thing, even if there are only a few elements. And to put them together, you can use a wide variety of accessories, for example, studs and pins for jewelry. By varying their color and size, you can use the same beads to create completely different earrings with your own hands.
It is worth considering the type of face. Chubby women should give preference to elongated earrings or earrings with pendants. Thanks to them, the oval of the face visually lengthens.
To the owners square shape faces need earrings that visually soften the chin, for example, earrings in the form of chains or earrings with elegant pendants. You should not choose large earrings, especially those decorated with square stones, as such jewelry makes the lower part of the face even heavier.
If your face shape resembles an elongated oval, then earrings are needed in the form of droplets or rings. It is easiest to choose earrings for ladies with an oval face - any shape and size suits them.
In addition to your face shape, you should also consider your body type. Fine jewelry suits slender women. If the figure has expressive shapes, then noticeable earrings are needed.
The shape of the earlobe is of no small importance when choosing options for making earrings. If the earlobe is small, you need oblong earrings, but if the earlobe is large, then the earrings should have a flat shape. Light earrings of miniature sizes look best on a thin lobe.
Today, earrings in the form of rings, chains and studs have become fashionable.. Rings are classic earrings that you can very easily make with your own hands, but when choosing materials for work, you should pay attention to the lock. Chain earrings have always been distinguished by their grace, light weight and ease of use. Stud earrings generally suit everyone, are comfortable and cute. When making them yourself, you should pay attention to the tip so that it is not sharp, and to the lock - it should be slightly tight.
How to make fashionable and modern earrings with your own hands. Master class for beginner needlewomen.
We make interesting earrings with pendants from rings and beads with our own hands. Master Class.
Next article.
Fashion changes every day. This process always happens, because with every passing minute new ones appear. fashion trends. But the fashion for handmade accessories is as relevant as ever. Earrings are especially trendy, because they are part of any woman’s look. Every lady needs to learn how to make them herself. It’s worth trying to make earrings yourself at least once, and this master class will help you with this.
How to make earrings with your own hands with a master class
Before work, you need to prepare materials: earring earrings, pins, acrylic and Czech beads, nails, stones, bead huggers, pliers, wire cutters.
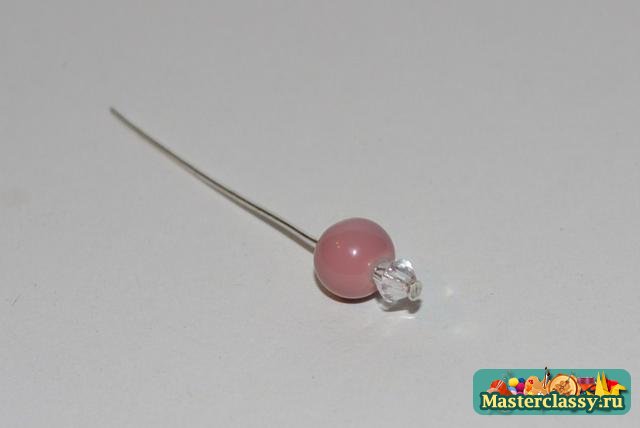
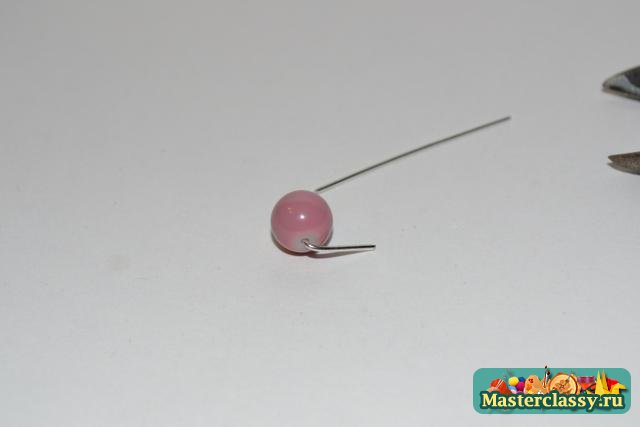
Getting started: put a Czech glass bead on the nail.
Then put on an acrylic bead.
Now you need to attach the bead hugger.
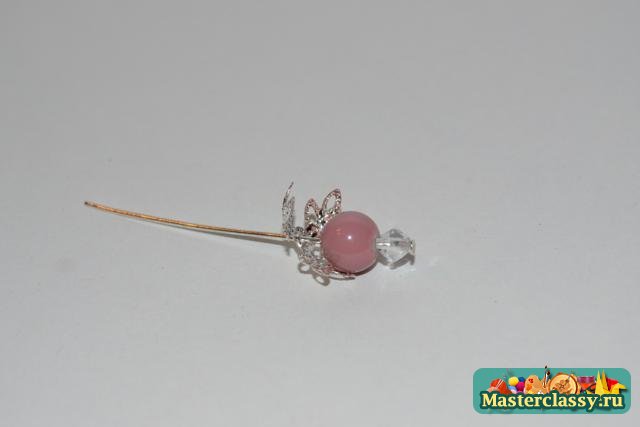
And fix it well with your fingers.
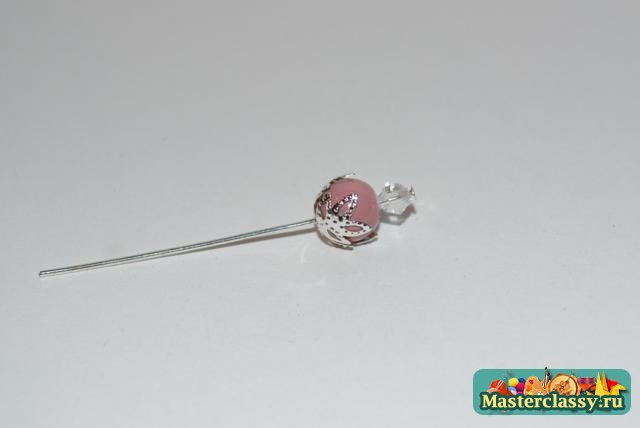
Gently bend the nail.
Now bite off the excess part of the clove with pliers.
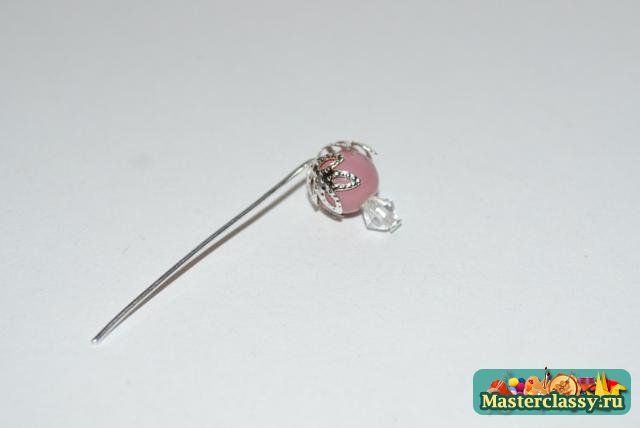
Bend with round nose pliers. The result was a blank.
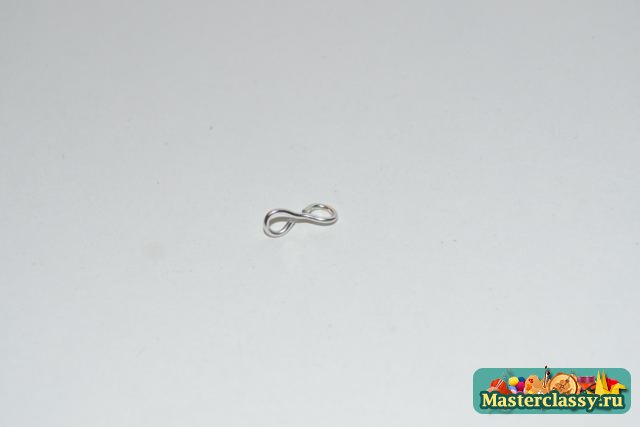
Using pliers, twist a ring from the excess part of the clove to make a pin.

Fold the other side too so that the infinity sign appears.
Bend the bent end on one side and put the blank on the resulting loop.
Bend the workpiece to its original position.
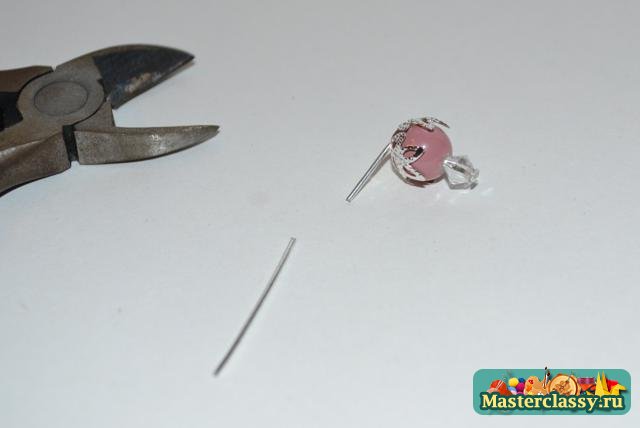
Now take a pin, a larger Czech bead.
Place the bead on a pin, bite it off and bend it.

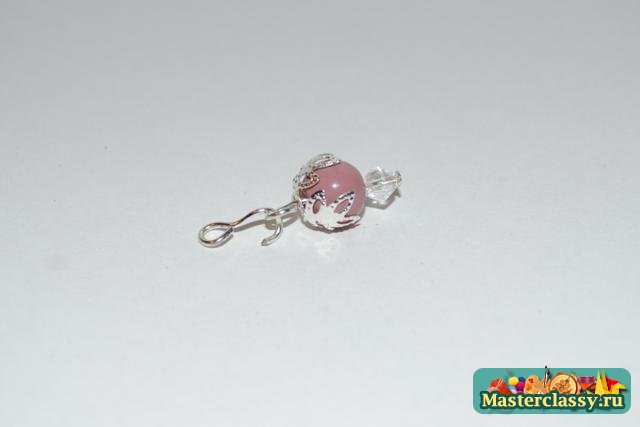
Take the wire and fasten it to this workpiece.
Prepare a ring by bending one end slightly.
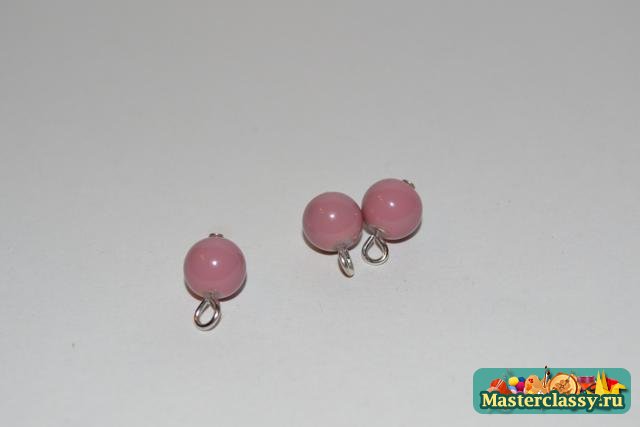
Take three acrylic beads and three nails. Place a bead on the nail, bend it, and cut off the required piece of the nail.
Bend it to the bead to make a ring. Do the same work with all acrylic beads.
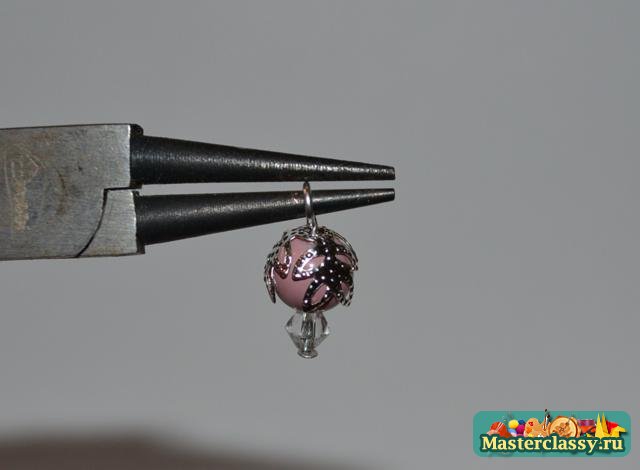
Let's assemble the earring itself. Take all the blanks and the ring made before.

We begin to put the blanks on the ring in this order: a pink bead, then a bead with a small bead and two pink ones.
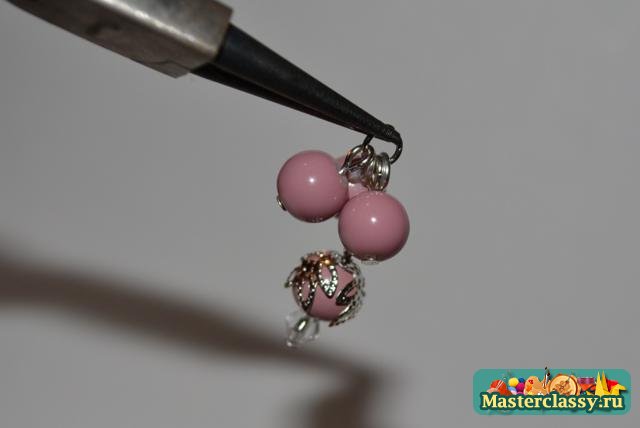
And attach a larger bead with a wire here.

They turned out to be very beautiful earrings.

This master class showed how to make original earrings using an interesting technique with your own hands; the description is suitable especially for beginners.
We make stylish wire earrings ourselves
Interesting works are made from wire, this one available material will help bring any product to life, step by step photos very helpful in my work. Beginners should just carefully study the essence of the work and get beautiful wire earrings.
Take a regular copper wire and bend it into a blank, as shown in the photo. So create a second ring. Beads are needed for decoration.

Now attach the thinner wire to the base.
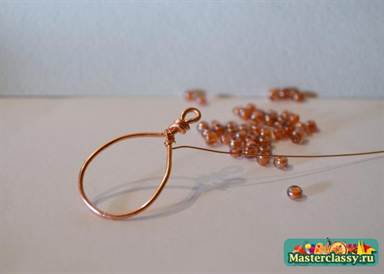
It's time to put on the beads. After each, you need to make about five turns of wire.

Take a thin wire again and attach it in the middle of the product from the top. Put on three beads, one bead, then another bead. Pull the wire itself through the last and larger bead and secure it.

Repeat all steps for another earring. The decoration is ready!
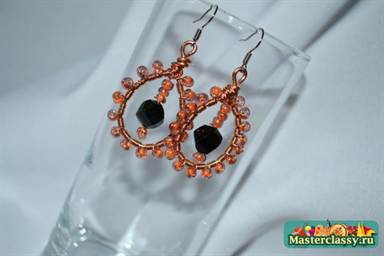
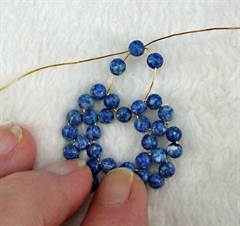
We create beauty from beads in a master class
An excellent option would be earrings made of beads. The principle of operation is similar to the previous ones.
For such a model, you need a special dense wire that will not break from frequent wear, wire-colored earrings and round beads.
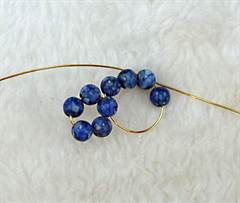
Place four beads on the wire and bend it into a loop, pulling the ends of the wire into the fifth bead.

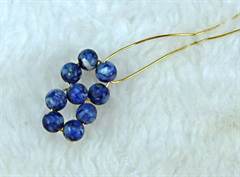
We put three beads on one end of the wire, and one on the other. Now thread the right wire into the third bead you put on. Tighten. Now there are two circles.
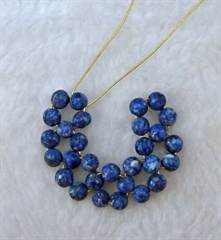
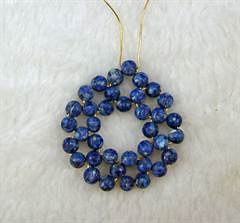
And in this way make circles until you get a large circle. Eight small circles should come out, and the ninth will be the last. The photo shows how to add the final beads and tighten. Attach the wire, for this you need a small eye.
Cuff earrings are the hit of the season
This version of fashionable earrings is very interesting with its design. They can be worn by girls who are afraid of getting their ears pierced. Cuff earrings are very extravagant and easily attach to the ear. The fashion for such earrings dates back to ancient times. During excavations, women were found wearing such jewelry.
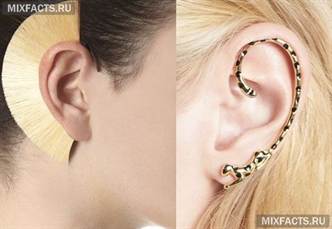
In the last century, cuffs were very popular, but their disadvantage was their large size. Now they are firmly in fashion again. Famous actresses wear these jewelry. Cuffs are placed on one ear; hair should be placed on the opposite side of the earring. A regular earring is put into the second ear, which matches the image.
Thanks to the right accessories, in particular earrings, you can complement any look and show your individuality. You can not only buy earrings, but also make them yourself. That's all for today necessary materials, special fittings, decorative elements are easy to purchase, and the process of making earrings does not take much time.
DIY earrings: master class
Beautiful earrings can be made from ordinary wire. Wire earrings are original and look stylish. To work you will need wire, hooks, six connecting rings, beads and metal pendants, as well as wire cutters and pliers.
In order to understand how to make earrings with your own hands for beginners, below we will offer a master class describing all stages of the work. First, use pliers to bite off three pieces of wire, one ring at a time. One of the resulting turns should be cut in half, the larger turn must be folded on one side in the form of a loop. On the edge that remains free, you can collect beads and metal pendants, then you need to make a loop on the other edge. Since the earrings will be double, the same pattern of work must be repeated with the small second ring. Then a ring, a large ring, a smaller ring and a ring should be attached to the connecting ring in turn. The same pattern must be repeated on the other edge. At the final stage, the central ring should be hooked onto the earring and the loop should be closed, and the second earring should be made in the same way.


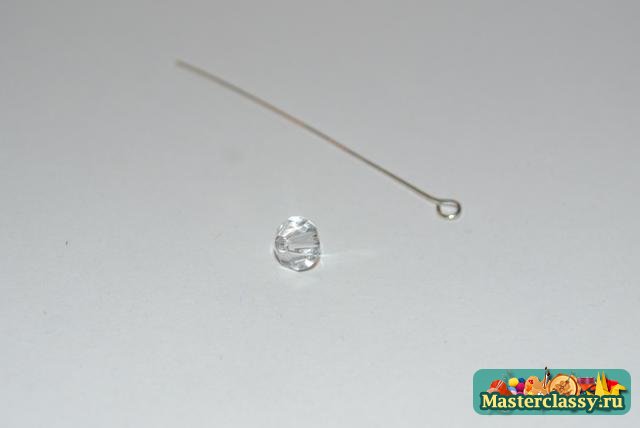
Master class on making earrings from beads
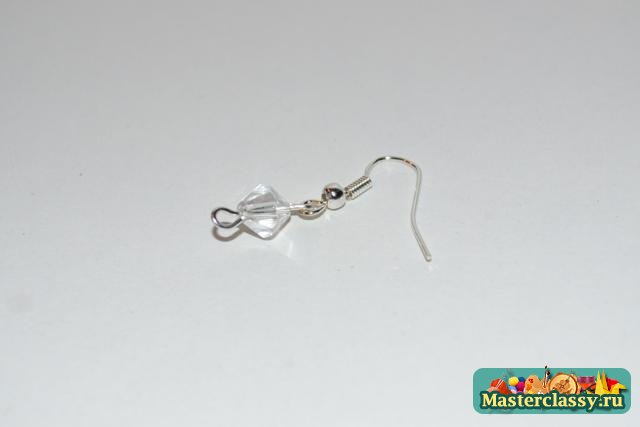
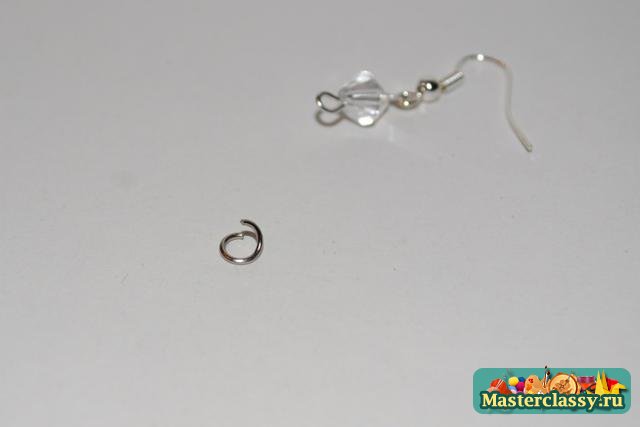
In order to make spectacular earrings from beads, you will need beads, accessories and a tool for work, namely pliers. The earring making process consists of several stages. First you need to put beads and other decorative elements on a wire pin according to your plan. Then cut the free part of the wire pin so that a piece of eight millimeters long remains and you need to make a loop from it. Then you need to hook the ring of the earring onto the resulting loop, and the product can be considered ready; in the same way, you need to make the second earring.
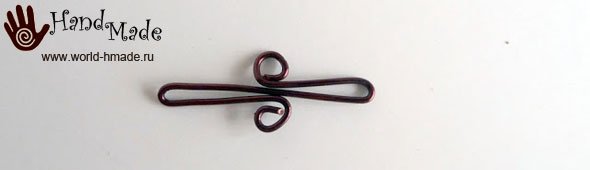
Master class on making a cuff earring model
Cuff earrings have been a real fashion hit for several seasons in a row. A distinctive feature of such earrings is that they can be worn in different ways, because in order to wear such earrings, there is no need to pierce the earlobe. In order to make such a model of earrings, you only need wire and pliers. All stages of work are shown in the photo.
First of all, you need to prepare a wire about seven and a half centimeters long, then bend a piece two and a half centimeters long, then make another bend. Next, the ends of the wire should be bent into rings, then you need to bend the product in half and use pliers to clamp the ends of the wire.


DIY earrings: video master classes
In the selection of videos presented below, needlewomen share their experience and tell how to make models of earrings from wire and beads, and also in one of the video lessons the features of the cuff earring model and options for their manufacture are explained.